

.png)
Have you ever wanted to make something new that you have never made before? I have forever wanted to make Roman Shades. I was overwhelmed the first time I went online and tried to learn about making these window treatments. So, I filed that thought for about 3 years.
This past year, an online customer and I were discussing projects, and we found out that we both wanted to make Roman Shades. We were laughing about how scared we were to try it. We both decided to move forward and encourage each other. This blog is my part of the story.
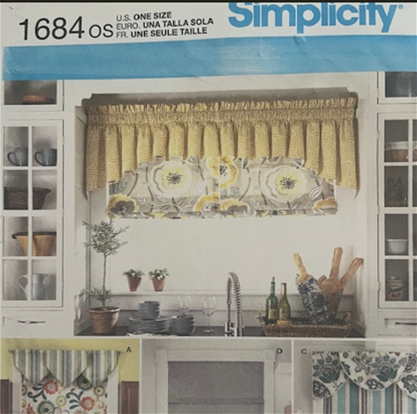
If you are a professional seamstress or have lots of experience making Roman Shades, this blog is really good if you need a hearty chuckle. If you are interested in making your own Roman Shades for the first time, this blog will help you learn some tricks and tips, as well as pitfalls to avoid. I definitely do not guarantee any results from the ideas shared in this blog! I watched videos online, read the Simplicity© Pattern given to me by a customer who stopped by the store, and thought through how to apply this to my particular windows. You will want to do all of that, too!
 Fabric Sage Says... Measure twice, cut once doesn't cover all the situations. There is often more that you must ponder.
Step 1: Measuring your windows for Roman Shades
Measuring width of window:
As I started to measure the width of my windows, I was struggling to decide how wide to make the shade. I knew by the nature of the sidelight that it had to be an outside mount because there was no window sill. But did I want it to take up the entire width of the area or just cover the window? I decided to just cover the window. I think that was a mistake. If I ever redo these Roman Shades, I will make them wider.
TIPS & TRICKS: Inside mount Roman Shades need to be measured very closely. Some window sills are not the same width at every portion of the window. Measure the width at different points. Go with the narrowest width so your shade actually FITS inside the window sill. Outside mount Roman Shades are the opposite in some respects. You want to make sure the shade covers the entire window plus a little if you want to keep out light. However, if the windows are next to each other, make sure the Roman Shades are not too wide and overlap with each other. That would be disastrous.
Measuring length of window:
I easily measured the length of my window, but wasn't sure how much extra to use to account for the top header part and the hem at the bottom. I ended up generally using this outline for measurement:
TIPS & TRICKS: You must consider repeat in the fabric pattern. My fabric did not have a repeat, so I could just use it as is. If your fabric has a pattern repeat, lay it out so you can see how best to align the pattern to make a cohesive look if the window shades will be hanging right next to one another.
Size to cut your decorator fabric:
Length = Length of Window + (any extra inches you want the length of the Roman Shade past the bottom of the window) + 7"
Width = Width of Window + (any extra inches you want the width of the Roman Shade past the edge of the window) + 3"
Size to cut your drapery lining:
Length = Length the same as Decorator Fabric
Width = Width of Window + (any extra inches you want the width of the Roman Shade past the edge of the window) - 1"
TIPS & TRICKS: Measure each window individually even if they look identical. My sidelights were surprisingly different sizes--not by a lot, but enough to make a difference.
Step 2: How to select your decorator fabric
Choosing the best fabric for your Roman shades depends on some factors:
Fabric Weight
Medium-weight fabrics are ideal—they fold neatly and operate smoothly. Learn more about fabric weight here.
Too light and the shade may sag; too heavy and it could strain the lift system.
Light Control
Choose based on how much light you want to filter or block.
Sheer fabrics offer soft light; opaque ones provide privacy and room darkening.
Drapery lining can also be sheer or room darkening.
Durability and Maintenance
High-traffic areas benefit from easy-care fabrics.
Consider how often the shade will need cleaning and how well the fabric holds up over time.
Stretch Resistance
Fabrics with minimal stretch maintain crisp folds and shape.
Natural fibers like cotton and linen are great, especially when backed or blended for stability.
Step 3: Purchasing supplies for your Roman Shades
I purchased all my supplies from the local hardware store, the local hobby store, online (random things I could not find locally) and of course from House Fabric:
1” Velcro
Sew on Rings
Cord lock (1 per shade)
Line
Lift cord condenser (1 per shade)
Pulls (1 per shade)
Screw eyes
Wood dowels
Metal rod
1" x 2" Wood
Wood screws
Gem Tac© (glue)
Simplicity© Pattern
TIPS & TRICKS:The amount of line you will need for each shade is a two step calculation. First, take the length of shade and add it to the width of shade for the total length of one lift line. (This will be plenty long so you don't have to worry about it being too short.) Second, take the total length of one lift line and times it by the number of lift lines required for your shade to get your total length of line needed per shade.
I gathered all my tools I thought I might need:
Sewing machine
Sewing box
Measuring tape
Cordless drill
Staple gun with staples loaded
Pointy nose pliers
Screwdriver
Hammer
Wire cutters
TIPS & TRICKS: It takes some time to gather the supplies, so build that into your project timeline.
Fabric Sage Says... When you are nervous about doing a project, other projects will manifest to keep you from moving forward.
I cleared my space and set up tables, and as I was starting to measure my material when in walks my son and daughter-in-law with my twin grandchildren. Seeing the sewing machine, they asked if I could alter some clothing for their first family photo? They had ordered 0-3 month-sized clothing but the outfits were really large enough to fit a 1-year-old. Time was of the essence as the photo shoot was days away. Here's one of the outfits I altered:

Fabric Sage Says..Making small things is always more difficult.
I forgot how difficult tiny clothing is to alter. If any of you have made Barbie Doll© or doll clothing, you know what I am talking about! Then family plans changed and the entire weekend was filled. I had to set aside my Roman Shades project for two weeks as my calendar was not free until then.
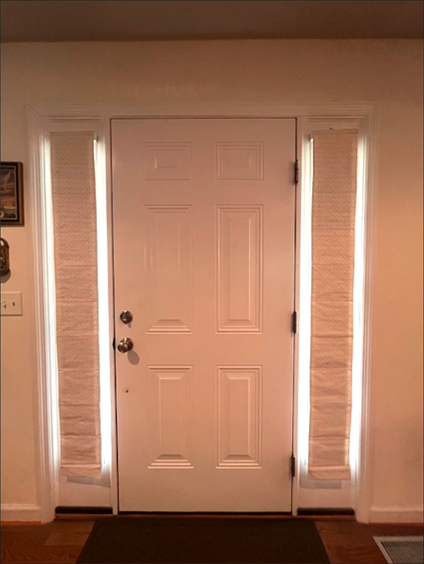
I planned to make Roman Shades for two sets of windows. You would think I had learned my lesson with the baby clothes, but obviously I did not because I decided to start with the Roman Shades that were for the smaller set of windows. My thought process was that if this went poorly, I would have wasted less fabric. I had sidelight windows at my front door and I thought Roman Shades would create some privacy at night, yet allow natural light during the day.
Step 4: Cutting and sewing your fabric
The front face and the back face of the decorator fabric I had selected looked almost identical, so I put an x on the back face so I would know which side was which.
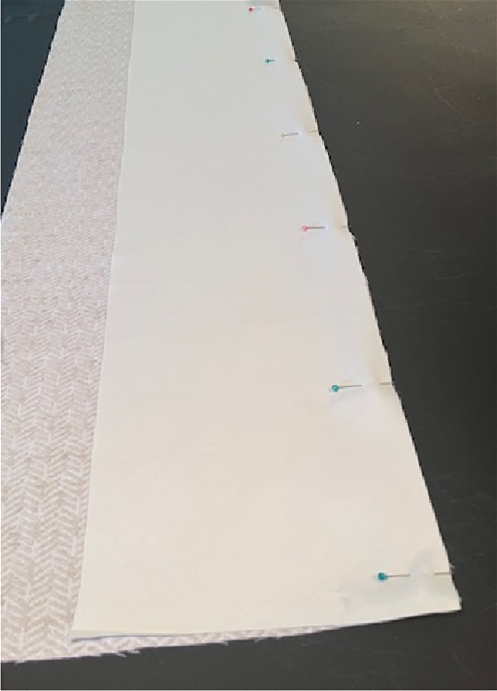
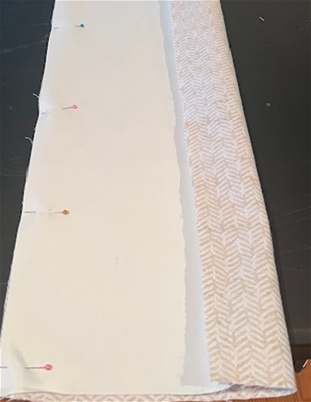
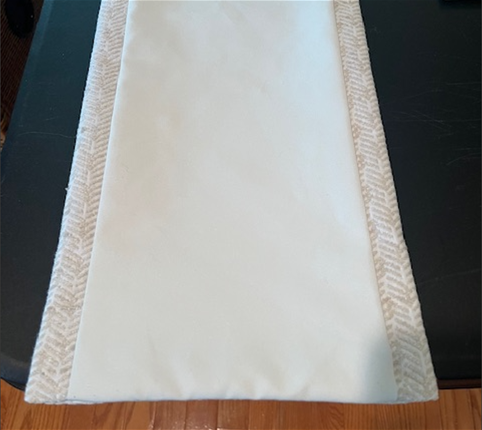
I cut the decorator fabric and the drapery lining to the sizes I had decided upon. Basically, you start out sewing a sort of "pillow case" if you will. You lay the lining fabric on top of the decorator fabric so the right side (the sides of each fabric that you want showing at the end) are facing each other. The decorator fabric will be wider than the lining fabric. That is on purpose. You pin down along the side where both fabrics are lined up evenly.
Then sew along that edge.
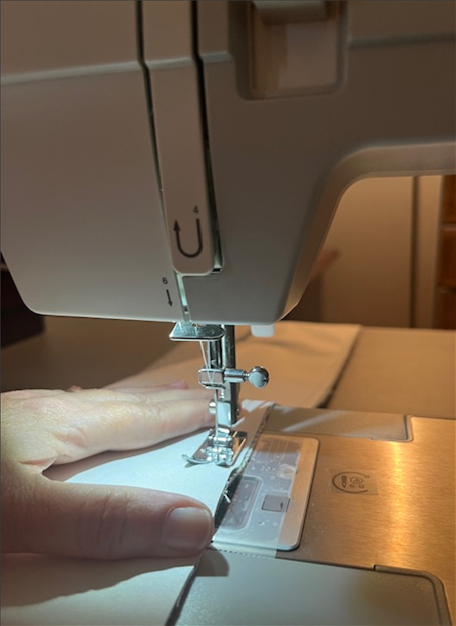
Next, pull the lining over so that it matches up with the other edge and pin it along the second side.
Sew down along that edge. Adjust the fabric to ensure the lining fabric is centered. Pin it to keep it centered, making sure not to pin into any of the drapery lining fabric. I then ironed these edges so they would have a crisp edge.
Sew along the bottom edge. Now you have a type of "pillow case" with 3 edges sewn shut.
Step 5: Placing your dowels
For dowel placement, I went online and read tutorials and watched videos.
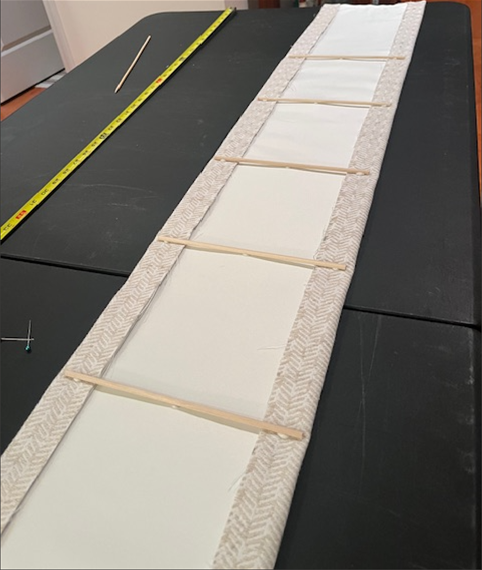
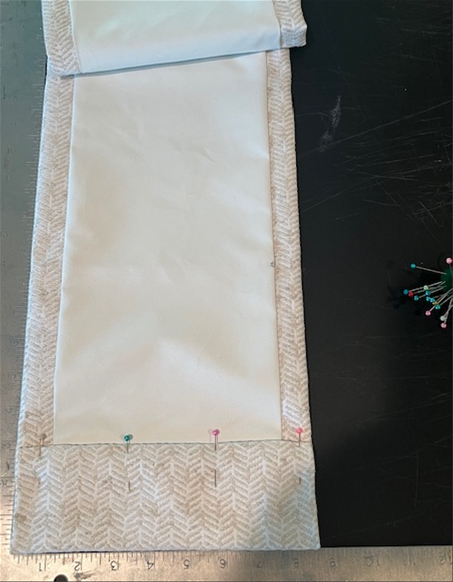
Once I decided the measurements, I placed a pin on both edges of the fabric wherever the dowels would go.
I used thin wood dowels which were easy to cut with wire cutters. I cut them a half inch shorter than the width of the shade. I used Gem-Tac© to attach the wood dowels because they said it doesn't show through or discolor the fabric.
AVOID THIS PITFALL: My container of Gem-Tac© had dried out. Not sure why as it was a brand new bottle. Thankfully, the hobby store let me do an exchange and let me open the bottle to check the quality of this replacement bottle. It was just fine. However, since this happened in the middle of the project, it caused another time delay. So check your glue before you leave the store!
Fabric Sage Says..Patience is a virtue. If it says you must wait 24 hours for full drying of the glue, believe the instructions. Otherwise, your dowels will move and make more work for you.
Step 6: Turning "pillow case" right side out, sewing bottom hem and cutting to final length
Once the Gem-Tac© dried for 24 hours, I turned the "pillow case" right-side out, carefully grabbing each dowel as I moved them with the fabric. Because my sidelight windows are thin and long, as well as the fact that I selected a thicker decorator fabric and blackout lining, this was very challenging. I had to go slow and carefully so that I didn't break the dowels. Honestly, this was the most difficult part of this project.
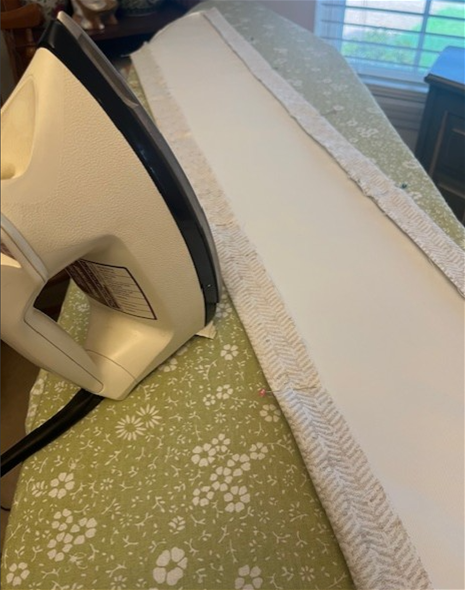
Once the pillow case was right side out, I pushed out the corners along the bottom edge and ironed the bottom and sides to make a crisp edge.
I stitched along the finished edge of the fold. Then I stitched up along each side from the bottom edge almost to the finished edge leaving room to insert the heavier rod.
Next, I held the shade up to the window and realized I liked the longer shade, so I didn't cut off any extra across the top.
AVOID THIS PITFALL: I didn't realize that I wanted a longer shade until I held up this first shade which was longer than it should have been. I liked the way it covered past the bottom of the window, so I didn't change it. However, I didn't realize that would make my last segment much longer than the other segments! So when the shade was drawn up, it doesn't look perfect. Oh well.
Step 7: Attaching the Velcro© and rings
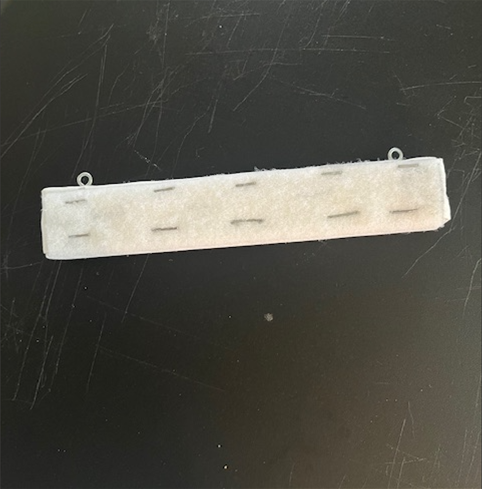
Next, I tucked the decorator fabric and drapery lining fabric in towards each other 1" below the top edge (that edge should be the only open edge of the "pillow case") to create a finished edge. I pinned the loop side of the Velcro© straight across the top edge on the drapery lining side of the Roman Shade. Next, I sewed the Velcro© down along both long edges of the Velcro©.
Starting at the lowest wood dowel and skipping every other dowel, I hand-sewed rings for the lift lines on the right and left edge of the lining side of the shade. I made sure to sew down around the dowel and back up through the fabric. Regular-width shades need a ring horizontally every 15 inches or so. My shade’s width was so small it needed only two rings per horizontal dowel line. In the end, my shade had 2 lift lines and 4 horizontal pleats (so 8 dowels) because it was so long.
Step 8: Creating a headrail and attaching hardware
This step sounds easy, but I thought a long time about it because I was not doing an inside mount which usually uses a 2" x 2” piece of wood. I didn’t want my headrail to stick out that much. I decided to go with a 1” x 2” piece of wood. This was a risk! I waited to get the cord lock to make sure if would work on such a thin piece of wood which it did. I cut the wood to the width of the finished Roman shade. So the 2” side was flat against the wall while the bottom of the 1” side was where I planned to attach hardware.
I used a double layer of the drapery lining to wrap the wood like a Christmas present, and I used my staple gun to attach it on the back side which is the side that would ultimately be mounted against the wall. My staple gun wasn’t very strong, so I had to hammer the staples all the way in.
I attached the hook side of the Velcro© across the front-facing side of the header with a staple gun. I then attached the curtain to the header with the Velcro©. I marked on the bottom of this headrail where I would be attaching the lift line hardware. Basically, if you drew a straight line up through each ring located down the shade, it would end where you need to attach the hardware. I then attached the screw eyes at those locations.
TIPS & TRICKS: Pre-drill holes in the wood so that attaching the hardware will be quick and easy!
I installed the line through the cord lock before attaching it to the header rail. You can watch videos about feeding line through the cord lock here. I ran the line down through each ring to the bottom rings and tied them off. I used the lift cord condenser to bring the cords together into one, and added the pull at the bottom of that line.
Step 9: Installing the Roman Shade
Fabric Sage Says... Things may not be as they appear.
I went to pre-drill holes in the wall for my exterior-mount head rail. I had everything I needed and was soooo close to the end. I started my drill and it would not even make a dent in the wall. I questioned my physical strength. I did what every real person does -- I pushed HARDER. Nothing. That’s when I realized I was dealing with a steel entry door system with sidelights. I did not want to purchase the drill bits and special screws needed for getting through metal. Honestly, I just was not looking forward to another trip to the hardware store. So I did what every real person does...I found heavy duty Velcro© that could hold 15 pounds of weight sitting in our garage specialty area (also known as "the mess").
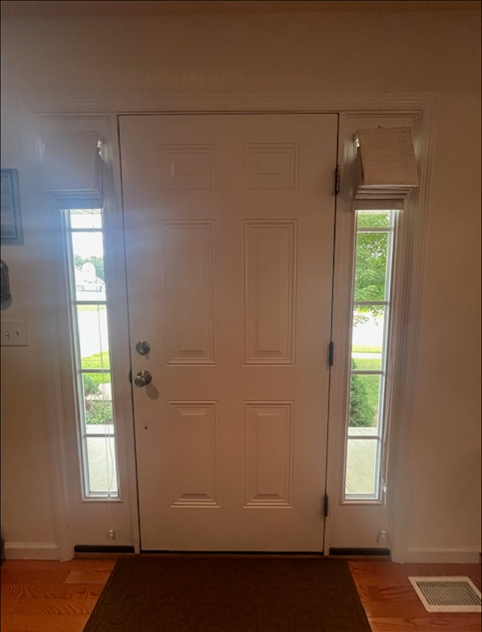
I cleaned and dried the wall above the sidelights. I measured and applied the loop side of the heavy duty Velcro© above the sidelights. I measured and stapled the hook side of the heavy duty Velcro© on the back side of the header (remember from above, the back side is the side that would be facing the wall). I put the curtain on the header and voila! It held up my Roman Shades which actually work and look pretty good! Whoop! Whoop!